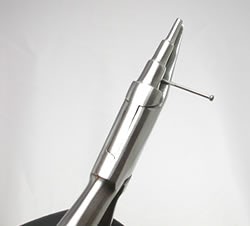
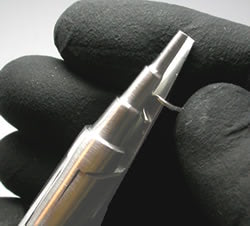
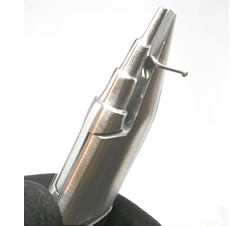
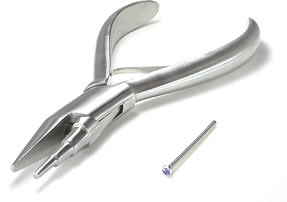
Whether you’re a piercing artist interested in learning how to bend fishtails into custom nose screws for your clients’ nostril piercings or you just want to make your own perfectly-fitting nostril screw, these instructions will step you through the process of properly manipulating a fishtail. All you’ll need is a fishtail to practice with and an appropriate pair of jewelry pliers like the nose ring pliers shown immediately below.
Before You Begin…Please Note: It’s important to keep your jewelry clean. If at all possible, wear clean, disposable gloves when you bend your jewelry. If you don’t have gloves, wash your hands well with antibacterial soap before doing the bend, and wash the jewelry with antibacterial soap and warm water afterwards. |
|
|
|
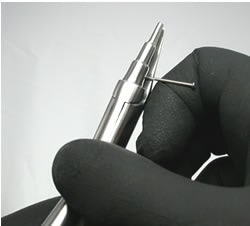
Step 3: Curve the Fishtail into a J-ShapeUsing your thum, curve the nostril fishtail around the outside of the thickest layer of the tiered plier tip. Make sure the screw is being bent evenly and straight! |
|
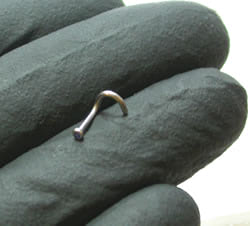
The nose screw should look like this once bent around the pliers.
|
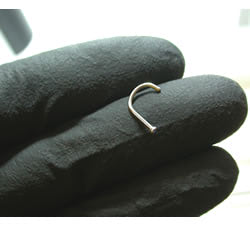
Step 4: Check Your Bent Fishtail’s ShapeSlide the bent fishtail off of the pliers gently, not pulling at the screw. It should look like the “J”-shape shown above when complete. |
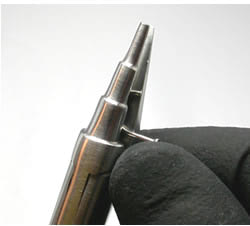
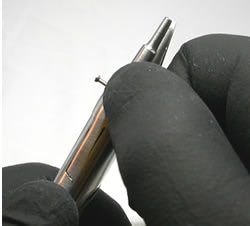
Step 5: Prepare to Make the Final Bend in the Fishtail to Make a Nose ScrewTake the J-shaped fishtail and place the curved part back in the pliers as shown in the image below. Place it far enough into the pliers to ensure that when you’ve made the final bend, the wearable area will be long enough for you. Use the following pictures as a guide.
|
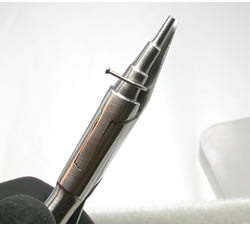
Step 6: Finish Converting a Fishtail Into the Perfect Nostril ScrewClosing the pliers, gently push the straight part of the nostril screw straight down (or away from you, if you’re holding the pliers parallel to your body rather than the ground). Be sure to keep the top part of the shaft (i.e. the wearable area) straight as you put this final bend in your fishtail jewelry to convert it to a nose screw. Keep pushing until the bend looks to be 90º, as shown below. Look at the screw before removing it from the pliers and make adjustments to your bends as necessary. |
|
Here’s another view of how the nostril screw should look after you’ve made your final bend. |
Voila! You’ve just formed the perfect nose screw! Clean it, and enjoy! |
